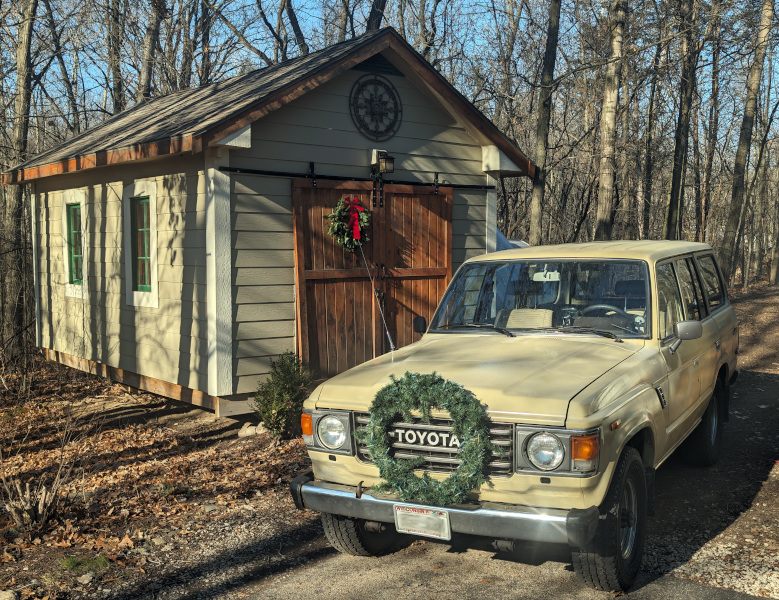
My Toyota Land Cruiser FJ60
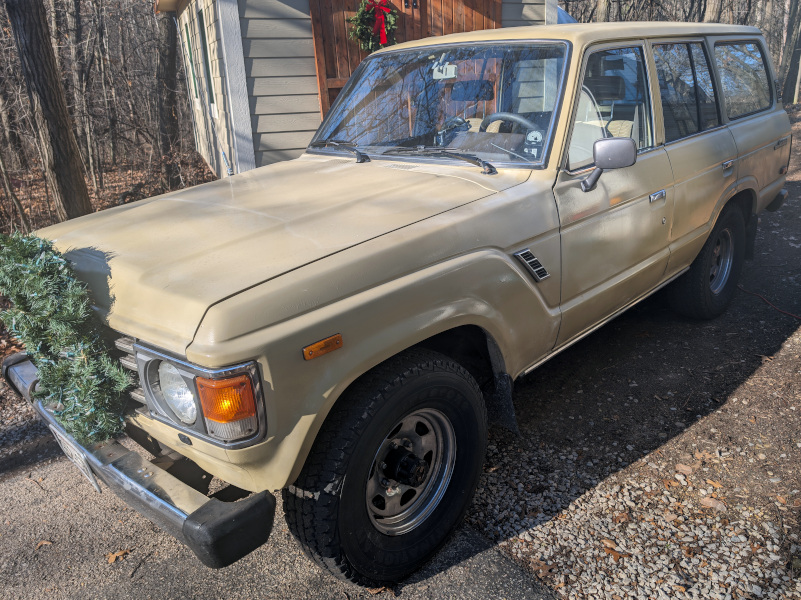
I drive a 1985 Toyota 4WD Land Cruiser FJ60 with a 2F, 4.2L, 6 cylinder carbureted engine.
Chapter 0: A Return to Sanity
[185,000 miles] I bought this FJ60 to replace my 2005 Chevy truck. In a sense, I knew that I could trust Toyota mid-80s offerings, as a result of my experience with the greatest vehicle I have ever owned. My story with this FJ60 starts with 185,000 miles on the odometer in October 2010.
I bought the truck on eBay for $4500 from a guy in Arkansas, flew to Little Rock on a one-way flight, and drove it back to Wisconsin (apart from some shenanigans with a faulty fuel pump installed by the seller, I had no trouble). The drive back north was through some very pretty parkland I had not been in before.
This vehicle is awesome.
Chapter 1: Punchlist
Because my goal is to reduce the amount of time I spend maintaining automobiles, I had Gary's Auto do a complete check and compiled a punchlist of things to fix or improve as part pf the deal. My goal was to directly swap my doomed Chevrolet truck for this one. I sold the Chevy for $8200, which leaves a budget of $3700 to spend on the improvements. I added a $650 allowance for new tires, since I would have to have purchased new tires for the old vehicle as well, leaving me $4350 to spend.
[190,000 miles] Here's my punch list after the first 5000 miles I've owned the vehicle. Currently, as of June 2011, I've spent $3517.17 and 22 hours of my own labor on top of the $4500 purchase price to arrive at an excellent and reliable vehicle.
| Item | My Parts cost | My Labor (hours) | Shop Cost | Notes/External source |
| EXTERIOR | ||||
| Land Cruiser |
|
|
$4,500.00 | Joey in Arkansas |
| Inspection |
|
|
$126.00 |
Gary's Auto |
| Passenger rear view mirror — replace |
$27.00 |
0.1 |
|
|
| Install 2" receiver hitch |
$45.00 |
0.2 |
|
Acme hitch + Hopkins socket |
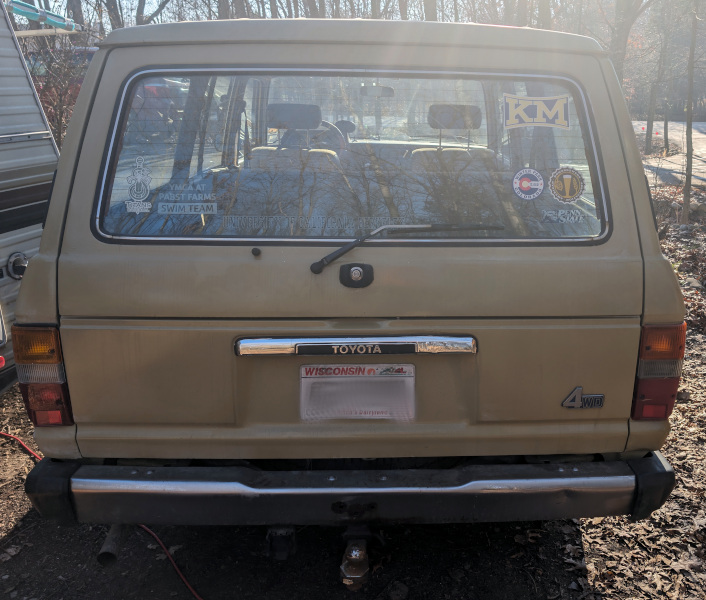
| Re-chrome rear bumper |
$40.00 |
3.0 |
$325.00 |
Badger Metal Finishing, Milwaukee, plus $40 bolt set from SOR. |
|
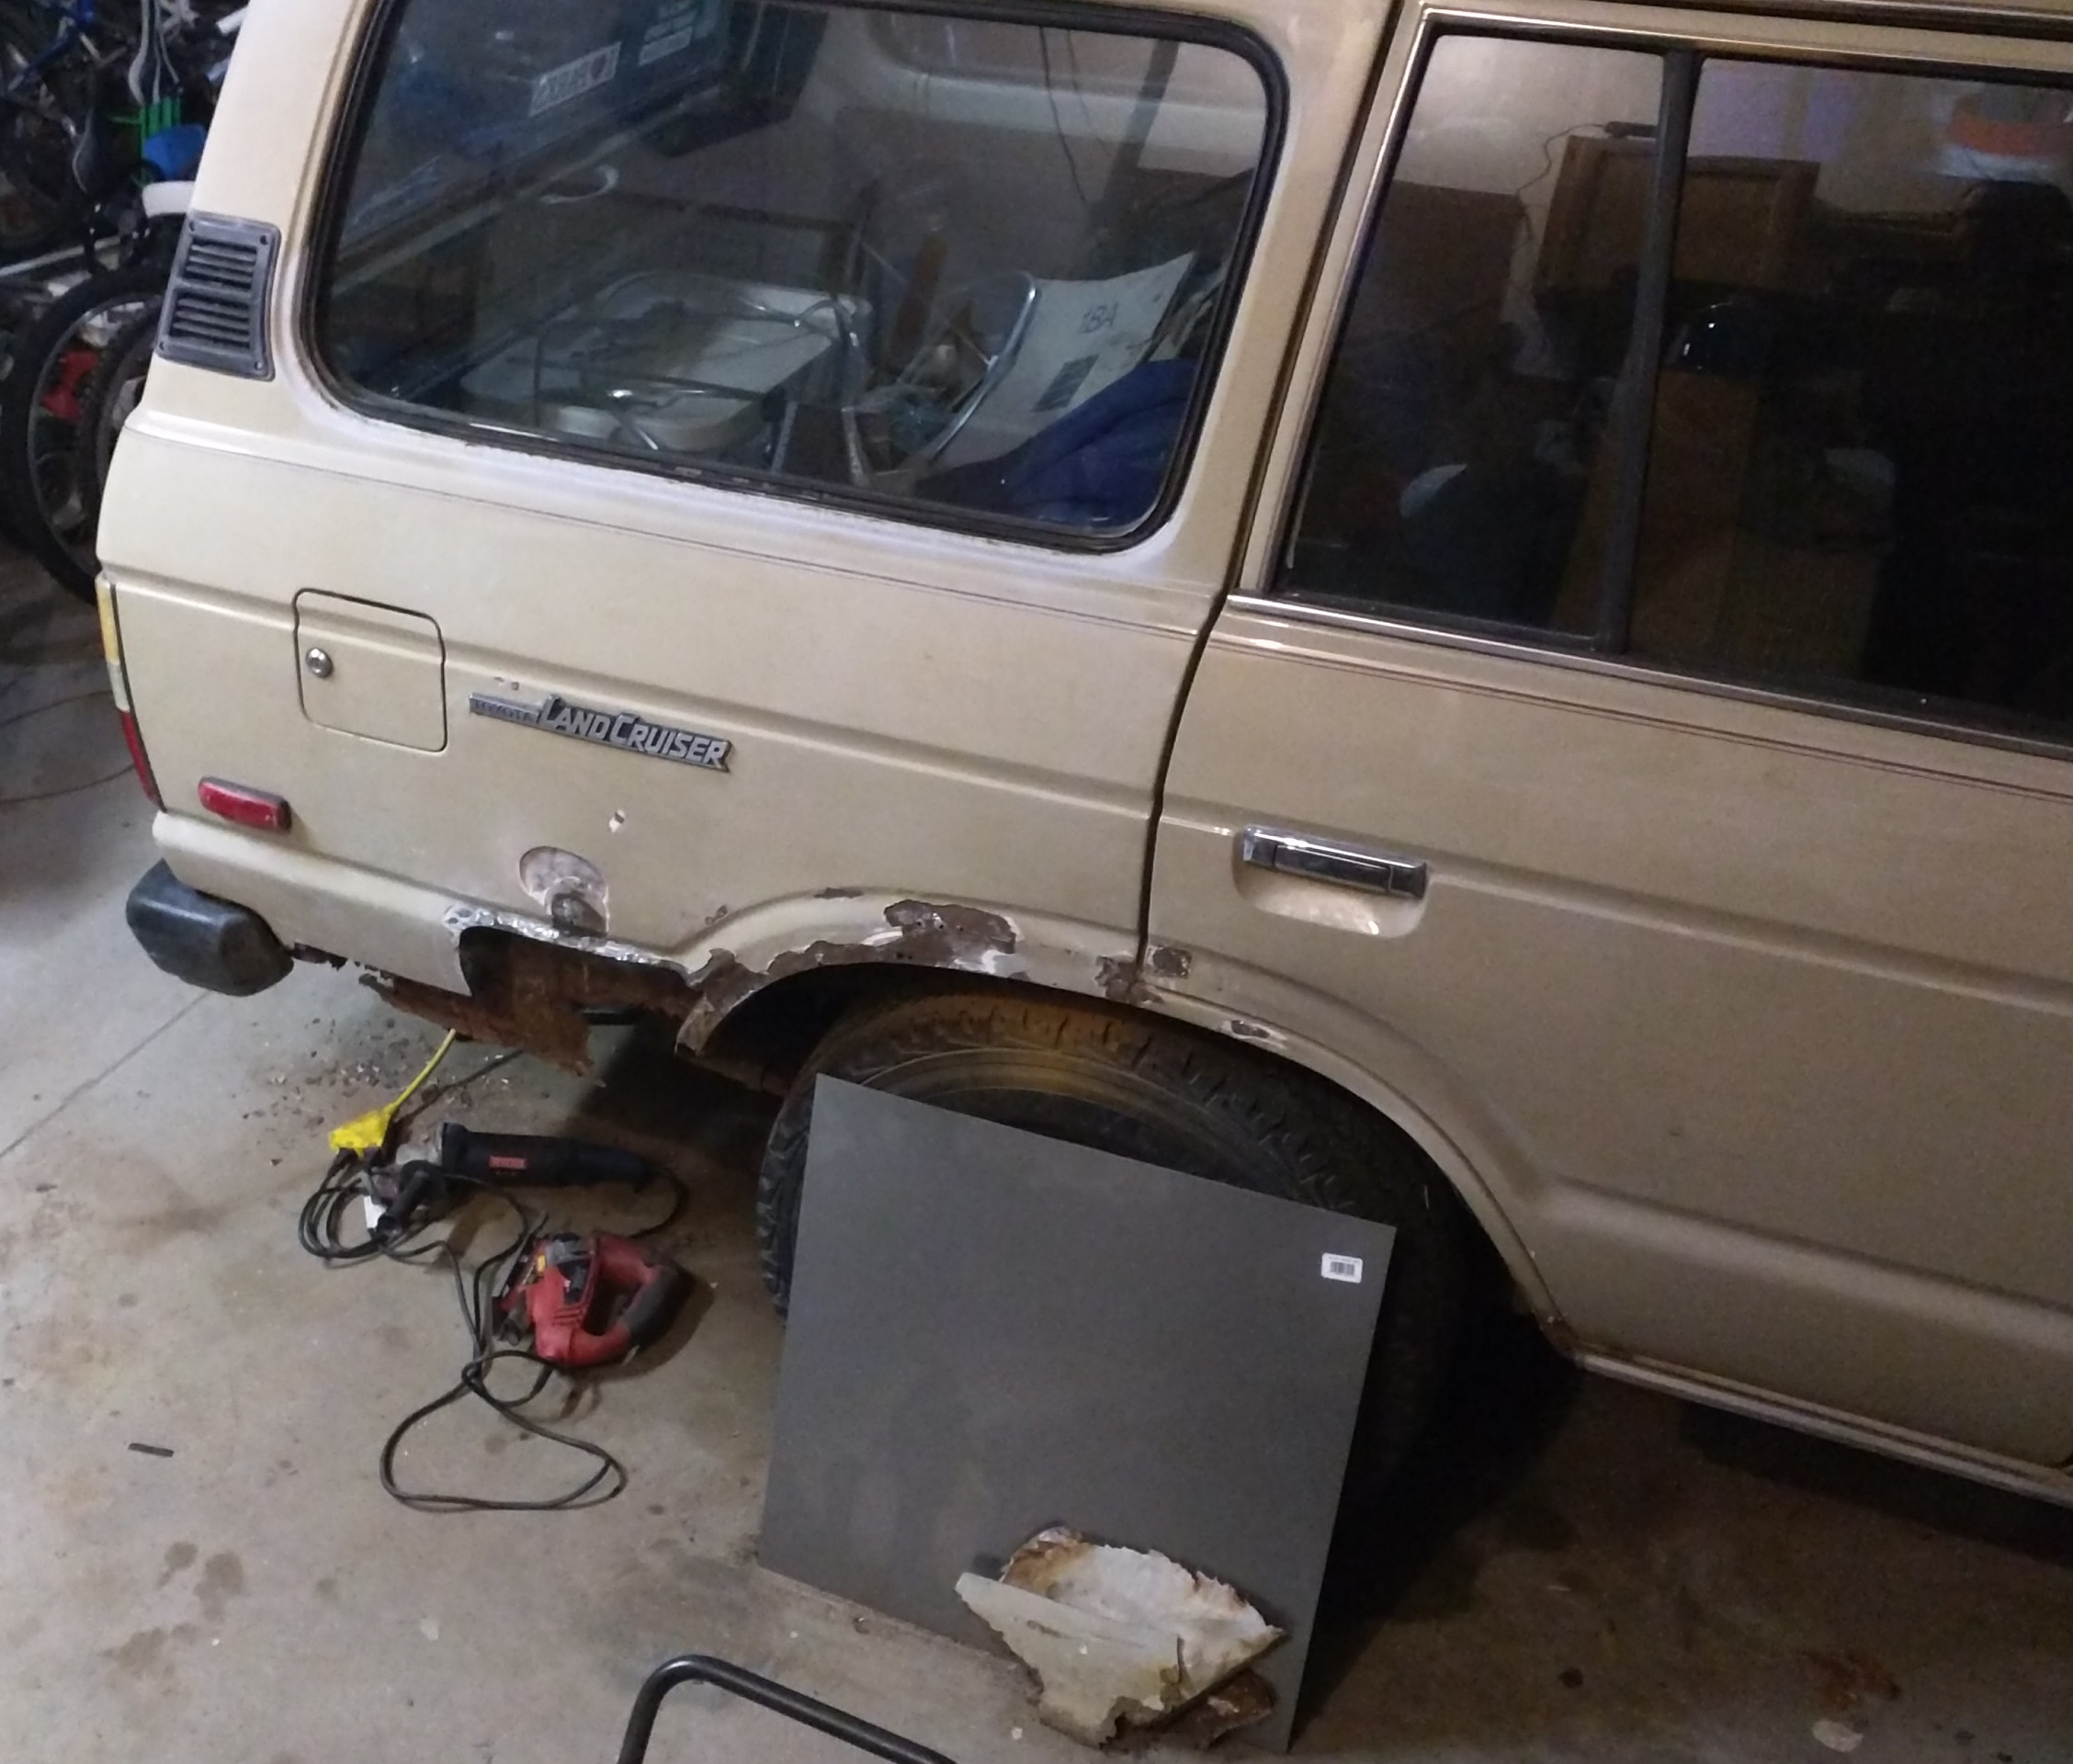
Passenger side rear wheel well (rust seal) |
|
2.0 |
|
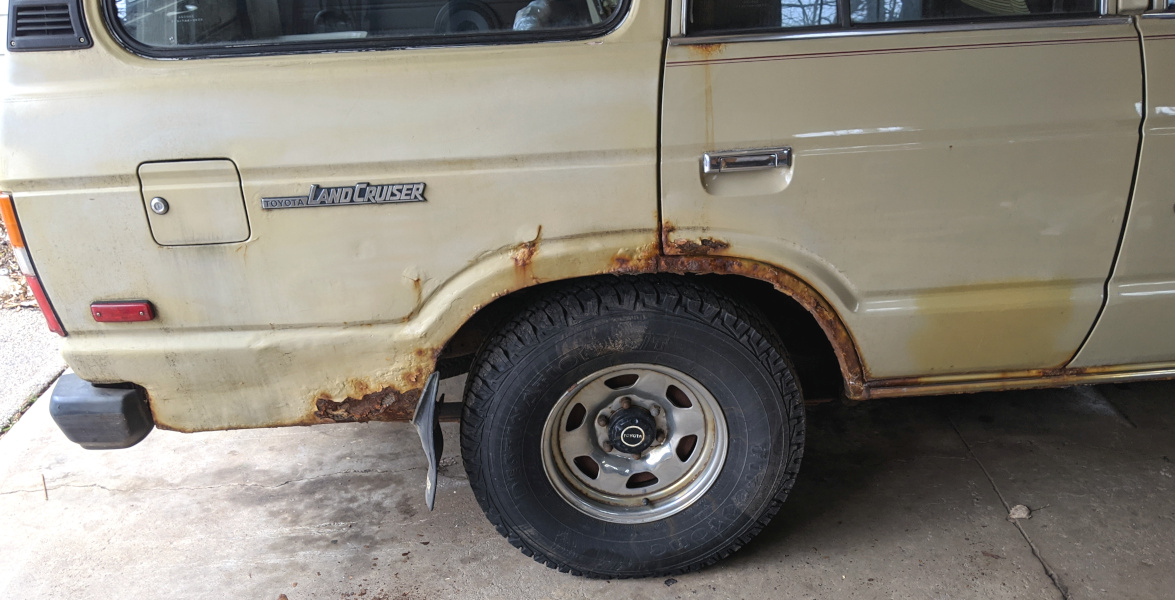
Naval jelly and sandblast, fill and paint. The rear right well can fill with water due to the gas filler hose opening. Also sealed this using a rubber pipe cap and some fabrication to create a grommet for the filler pipe. |
|
Tires — replace (Stock 235/75-R15, use 31x10.5-15) |
$556.02 |
|
$124.04 |
Gary's Auto mounting + disposal |
|
Rear lift-gate — struts replaced or repaired |
$35.00 |
0.5 |
|
eBay store |
|
Headlights — replace |
$32.00 |
0.3 |
|
AutoZone — Sylvania halogens |
|
Replace running lights |
$25.00 |
0.5 |
|
rock auto |
|
Clean and paint windshield wiper metal surfaces |
|
0.5 |
|
Rustoleum black semi-gloss I had on hand |
|
Rear wiring harness repair |
|
1.0 |
|
Untangle and re-wire existing trailer module |
|
Horn — repair |
|
0.8 |
|
Raise horn pad wiper ring with hot glue |
|
Fix rear window washer |
$3.90 |
2.0 |
|
Replaced washer hose from rear headliner back, disassembled rear washer motor mechanism, cleaned, re-greased and added water grommet fabricated from oogoo. |
|
Fix headlight windshield washer |
$4.99 |
0.5 |
|
Amazon: Scan-tech version of broken check valve, not an exact fit but can be made to work. |
|
Adjust hood front catch/bumpers |
$5.00 |
0.5 |
|
Fabricate new bumpers with oogoo |
|
|
||||
| CHASSIS | ||||
|
Replace all shock absorbers / mounts |
|
|
$464.56 |
Gary's Auto — W0133-162{1452,1148} |
|
Front end alignment |
|
|
$105.00 |
Gary's Auto — with tire replacement |
|
Inspect front and rear brakes |
|
|
$787.19 |
Gary's Auto — replace rotor, calipers, pads and lines in front |
|
|
||||
| INTERIOR | ||||
|
Add 12V power receptacles |
$15.00 |
0.1 |
|
Initially, a cheap USB power port, plus some re-manufacture to increase power. Upgraded to an Anker unit that properly does hi-amperage charging with newer phones. |
|
Add seat belts to rear bench seat |
$144.61 |
4 |
|
Seat belt Planet, the 1985 FJ60 already had the pillar mounts tapped, this is an easy job. |
|
Clock/thermometer |
$12.00 |
|
|
|
|
Add interior lights |
$22.00 |
1 |
|
Some aircraft-style lighting from JC Whitney (now carparts.com) with some careful addition of a ceiling mounting plate affixed to the metal roof (inside) with JB weld epoxy. |
|
USB/SD/Aux Stereo |
$40.00 |
2.0 |
|
Dual-XR4110 mechless |
|
Audio amplifier and rear speakers |
$12.00 |
0.8 |
|
Angle bracket, hardware, wire, I had an old 120W amp and speakers from my ancient Chevy Citation |
|
Clean, repair, grease window regulators and locks |
|
1 |
|
Take doors apart, clean all internal parts, grease and re-assemble. Remove metal clip on right rear door added by previous owner. |
|
Floor mats |
$70.00 |
0 |
|
New premium front mats from JC Whitney (now carparts.com), clean and re-use rear |
|
Add rubber dampers to rear seat clips and vibrations |
|
0.1 |
|
Fabricate from oogoo |
|
Fix or replace cruise control |
|
|
|
Removed obtrusive wiring from aftermarket add-on. This is a low priority — long term hobby project perhaps |
|
|
||||
| ENGINE | ||||
|
Fuel pump — replace |
|
|
$252.86 |
|
|
Replace choke control knob and cable |
$70.00 |
0.5 |
|
CruiserParts.net for the cable and electrical assembly, plus a knob fabricated from a leftover cabinet knob and some oogoo |
|
Measure compression |
|
|
$126.00 |
Gary's Auto — all OK = 145,151,142,152,146,149 |
|
Replace hardened vacuum lines and hoses |
$12.00 |
1.0 |
|
AutoZone stock item |
|
Replace air intake duct |
$20.00 |
0.2 |
|
Started with a generic duct hose from JC Whitney (now carparts.com), did some fabrication to make it fit |
Chapter 2: Reversing the Hacks
[189,000 miles] I had noticed a little bit of noise coming from the cooling fan, just a slight tic-tic-tic. It gradually got a bit louder and I did not check it out in time. The bolts on the water pump had not been properly tightened (perhaps in the radiator replacement done before I owned the vehicle). As I drove home from work one fine March day, the cooling fan sheared off the bolts and jumped into the radiator frame. My FJ60 overheated but not until i was just pulling into my garage. I had to replace the water pump, cooling fan, and then the alternator after I soaked the original one in coolant trying to refill the system. (It dried out and started working, but was a bit flaky so I figured just replace it, not very expensive for peace of mind.) The water pump bolts are tricky to tighten, and the previous installer had botched it.
[192,000 miles] My A/C compressor jammed, and this led to a bit of an odyssey. In the end, the root cause was a modification made to the A/C amplifier PCB before I owned the vehicle. One more hack removed.
[194,000 miles] My clutch master cylinder gave out. I rebuilt it with a special low-price "closeout" kit from Rock Auto, and then had an odd problem with the clutch pedal getting stiffer and stiffer as I drove, then eventually engaging the clutch without any pedal pressure at all. Turned out that the rebuild kit has a center pin that is 1-2mm too long, causing the valve to the reservoir never to open. A slight modification of the pin by adding a small metal band around the pin end inside the spring assembly fixed this condition.
[200,000 miles] The air injection pump was making some squeaking noises. The vehicle had been de-smogged so the air injection rail was already blocked off but the orifice on the pump had been left open and the vanes inside were either rusting or some dirt had gotten in. I found a nifty bracket with pulley on it from SOR to replace the air pump and serve as the belt tensioner. I replaced the steering pump at the same time since it was groaning.
Chapter 3: Maintain and Enjoy
[214,000 miles] The A/C belt spun off a few times, then I found that there is a roller bearing under the A/C pump that acts as a belt keeper, and it had frozen. A few bucks on Amazon got me a new one.
[215,000 miles] The front hubs require service as part of routine maintenance, and I finally did this job (there are some really nice YouTube videos to follow), also replaced the front knuckle bearings. Wish I had done this job before — the knuckle grease seals were shot and there was a huge mess of hardened grease and dirt.
[226,000 miles] I noticed that the transfer case always seemed to have too little gear oil, while the transmission was overfilled. A bit of online searching confirmed what I suspected — the seal between the two units is prone to fail, and the gear oil slowly drains into the transmission. Oh well, easy work-around until I rebuild the whole drive train. Just run a hose between the two fill plugs, with some custom shunt fittings.
[230,000 miles] Was a bit concerned about how to handle body rust, but it turned out to be a good way to learn a new skill. When the rear quarter panel rusted out I cut out the affected panel and welded in a new one I fabricated, then re-painted. It came out well enough that I think I can gradually replace the entire body if I have to.
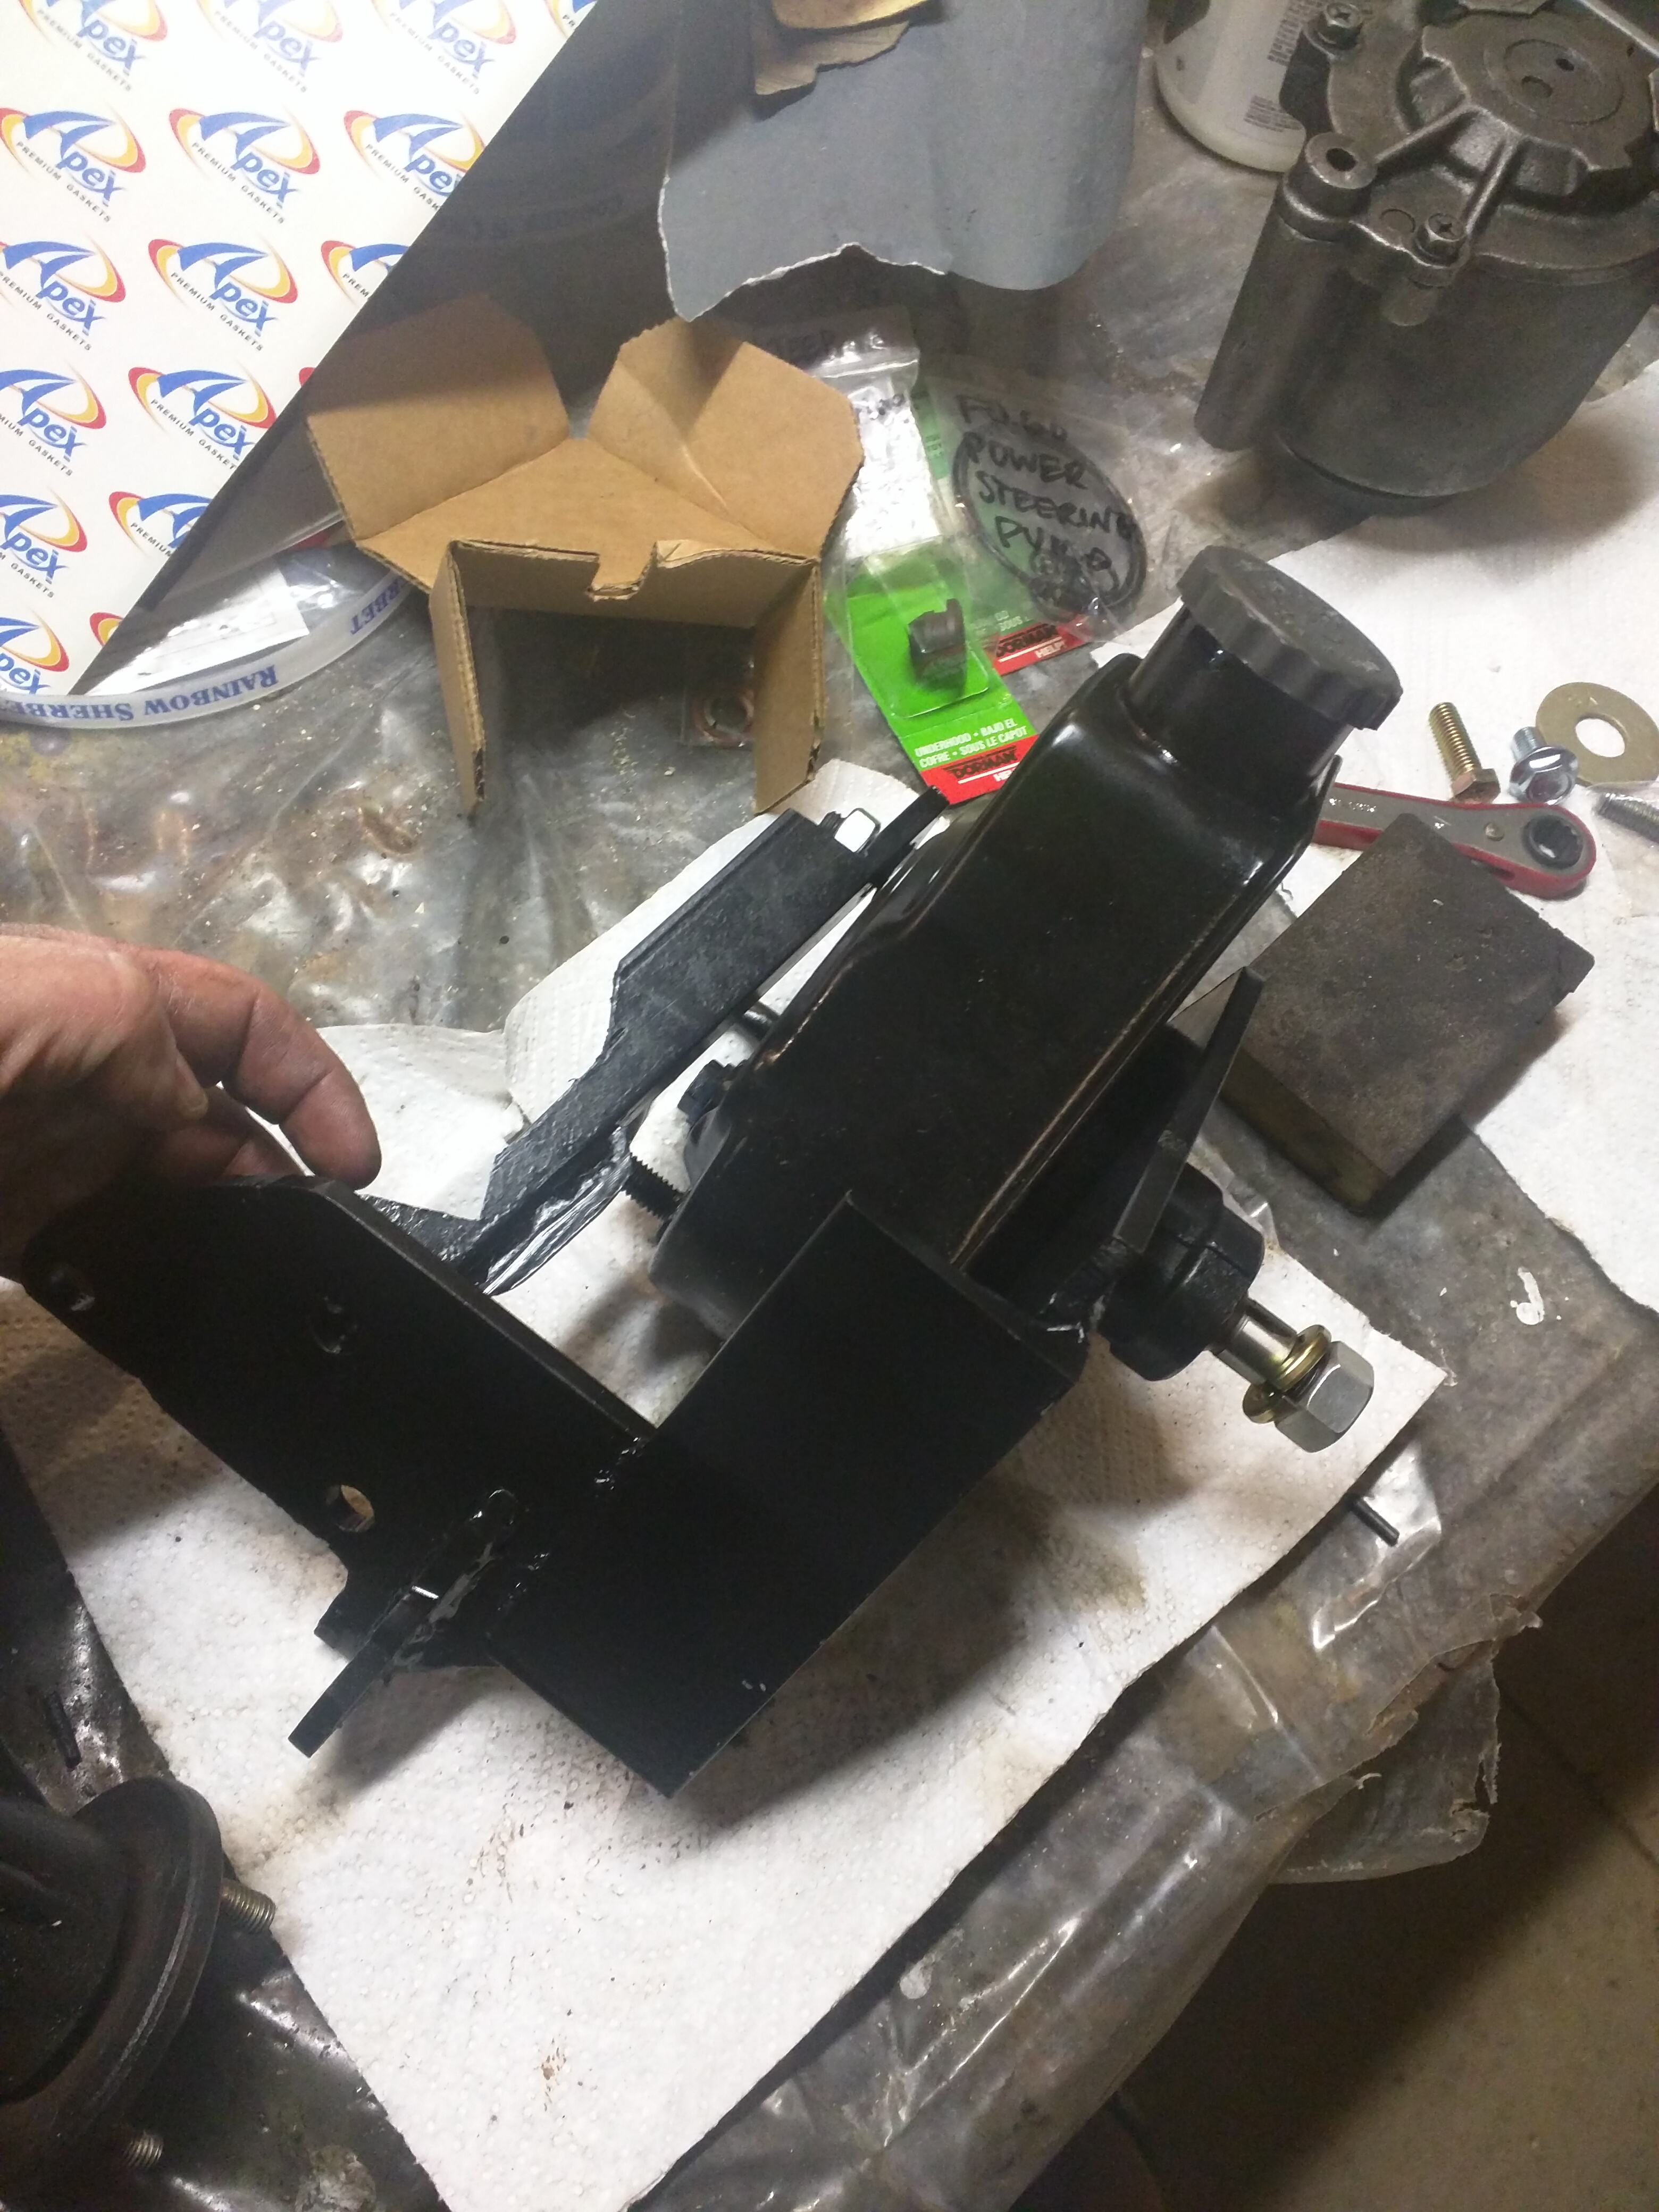
[237,000 miles] Got tired of rebuilt steering pumps. The FJ60 uses a pump with a brass bushing which wears out routinely, and cannot be replaced (unless you turn one yourself... which I might try sometime...). So I ended up making a new steering pump bracket to mount a GM Saginaw style pump. These pumps are available, inexpensive, and can be rebuilt easily. (another pic, and another.)
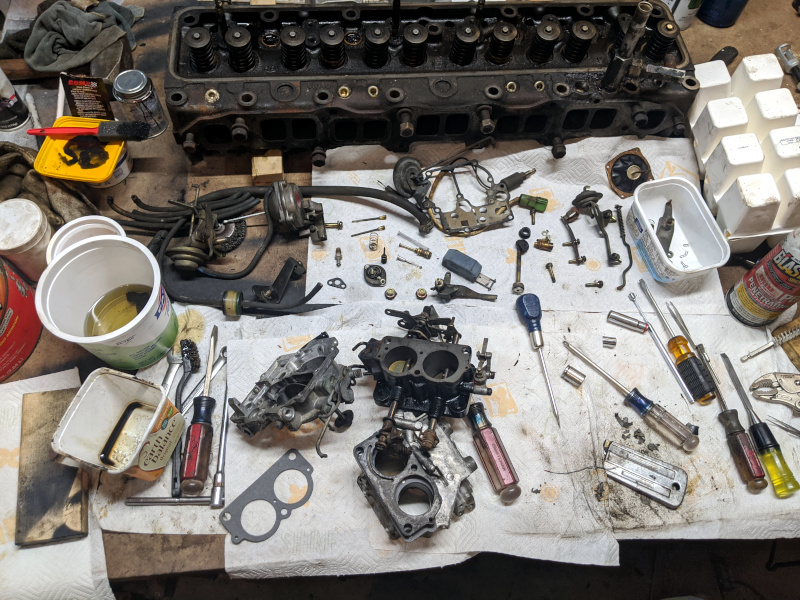
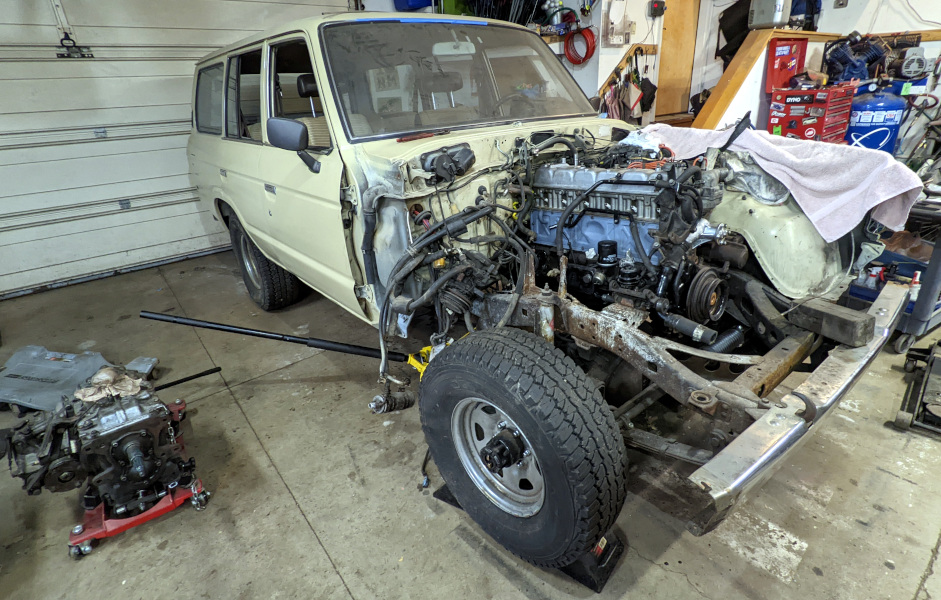
Chapter 4: Modest rebuild
[261,366 miles] The little things add up and goad me into a project.
- Camshaft worn — kicking myself for not using zinc additive in my oil for the old style lifters
- Many small leaks, rear main seal, transfer case driveshaft seals, valve door seal, and this has resulted in a lot of cruddy oil buildup in the engine compartment
- Emission system is ugly, vacuum lines old and unknown status of carb diaphragms and vacuum components
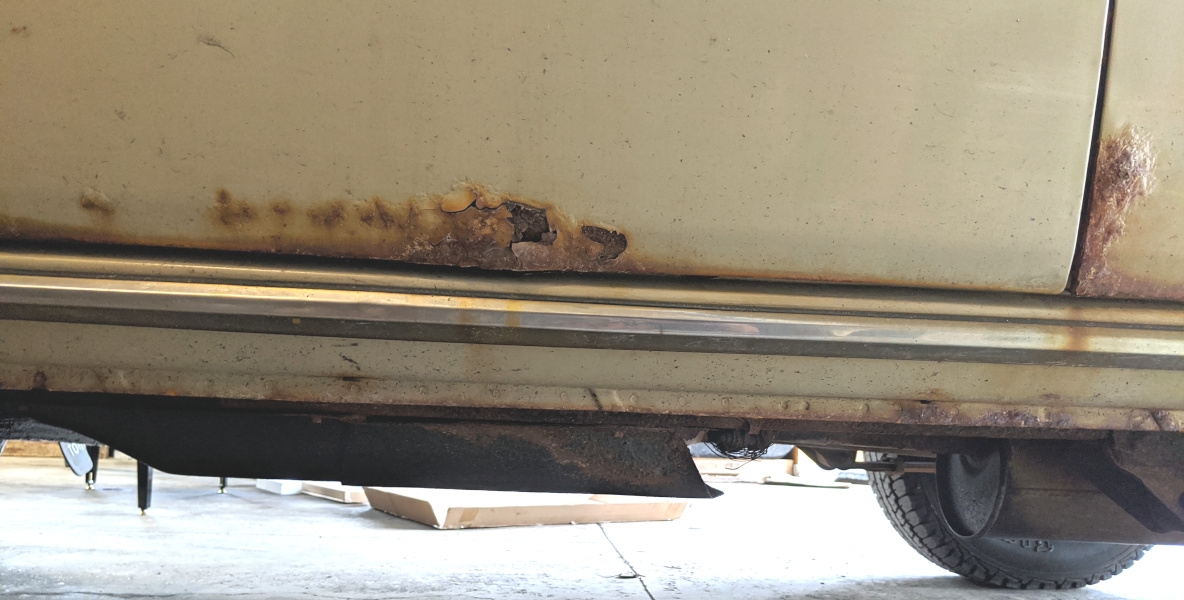
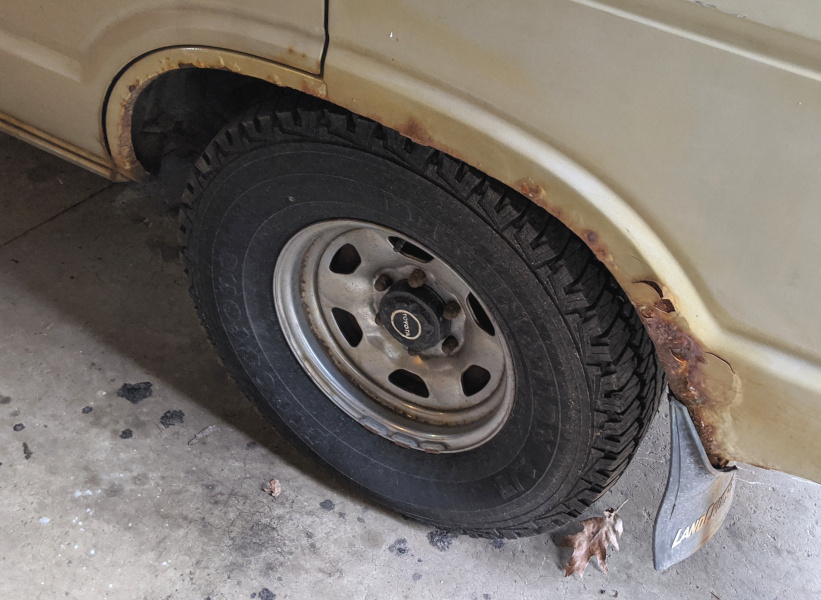
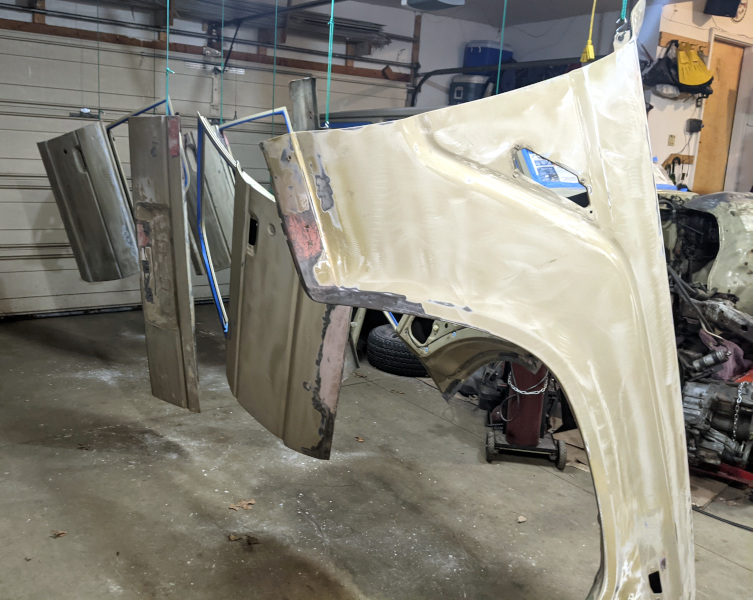
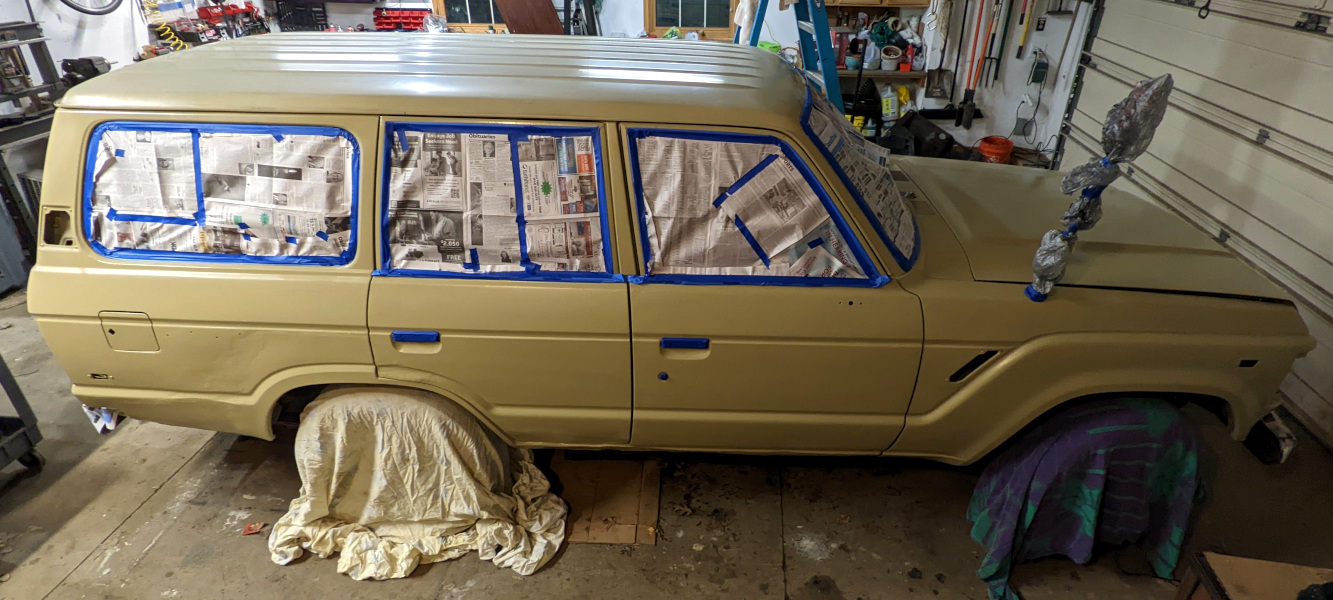
- Lower body rust on the quarter panels and rockers — kicking myself for not keeping the drain holes clear, plus my son advised me to use fluid film, but I'd like to start clean
- Sundry rust in body panels, old battery leak caused large hole in the front apron to rust out
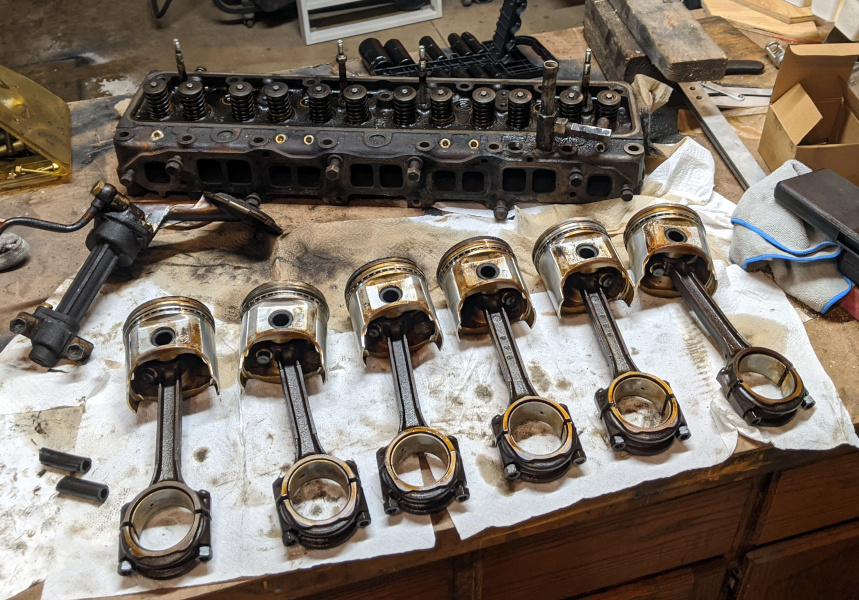
So, with all this in mind, and a global pandemic keeping me at home anyway, I pulled the engine and transmission, rebuilt the engine, and advanced my welding skills all around the body parts, cutting out rust and replacing. It feels incredibly good to throw unused air injection system components in the trash and get back to a clean fresh engine and body.
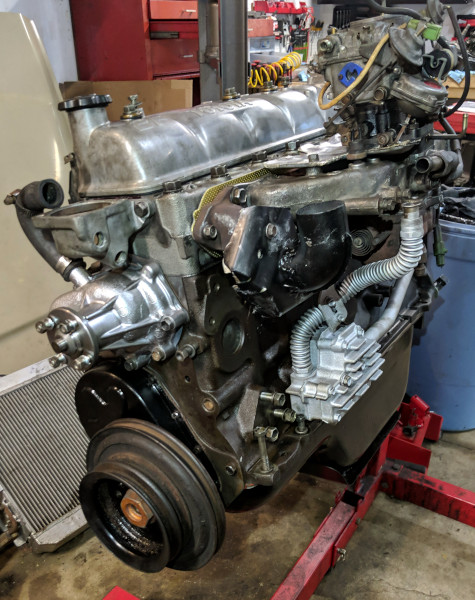
Chapter 5: On the road again
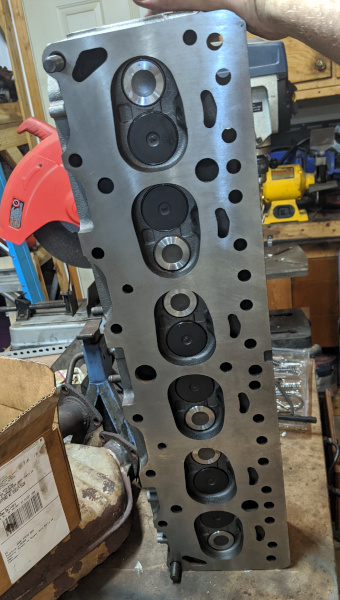
[262,840 miles] What's hard was easy, but easy stuff is important too. I was pretty paranoid about the engine internals during the rebuild. Bearing clearances all measured, removed and re-installed a new set of camshaft bearings after nicking the the first set while fiddling with the troublesome rear block plug that needs to be in, but not too far in. Had the head done at a machine shop, paid a lot of attention to all journal torques, head bolts, etc. Here's what I messed up — all pretty easy:
- Forgot to torque the crankshaft pulley nut — leading to a sad episode along the highway. I had simply ripped it on with my impact wrench, but the spec is 144 ft-lbs. A new nut installed properly with a homemade keeper, too.
- Intake/exhaust manifold not quite aligned — this is a two piece system and I failed to realize (and not mentioned in FSM) that you should torque it flat to the head before tightening the bolts connecting the two pieces. Noted for next time, meanwhile was able to install a new franken-gasket for now.
- Fried my oil pressure gauge, after casually grounding the sender wire on the wrong sensor tab. I used a mechanical gauge during engine break-in, then was able to repair the gauge.
- Gaskets can be tricky — I managed to have oil leaks in both the oil pan gasket (didn't realize how much better the OEM 1-piece gasket is compared to the 3-piece aftermarket ones, and had to pull the pan and put a proper gasket on) and the push-rod cover (just botched it somehow). These were both pretty easy to fix, but would have been much easier to avoid.
Chapter 6: Ooh that smell
[263,570 miles] I started noticing more gas smell in the cab. First I tested the EVAP system, and after making sure the lines and the carb valve at the canister worked, I took the canister apart, cleaned the ball valves in the lid, and replaced the activated charcoal. Still gas...
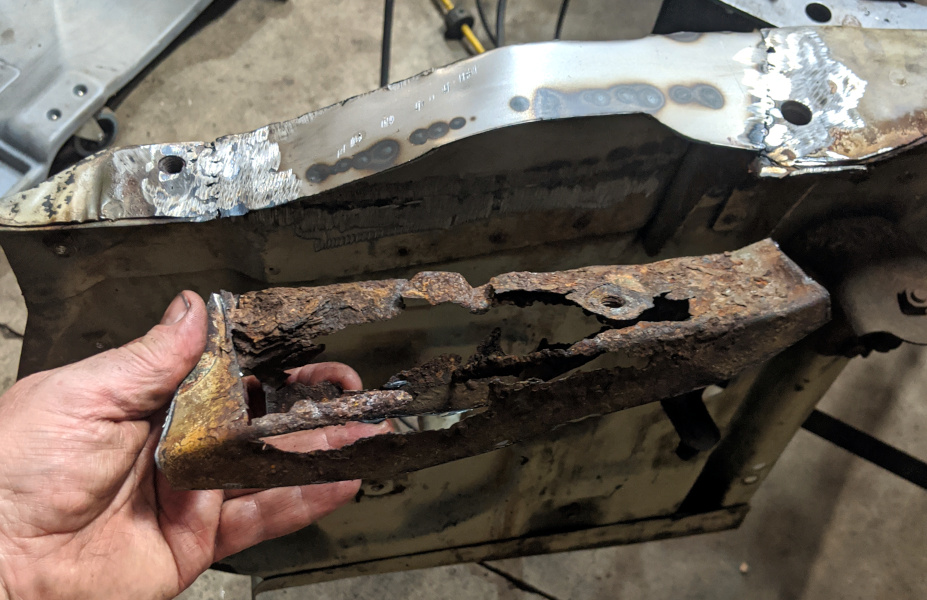
I inspected the fuel lines and once I wiggled the fuel return line from pump to tank, gas started to drip. The return line has a short flexible section and it had been replaced... with washer fluid hose. Sigh. But after I fixed that, a larger odyssey ensured, as even more gas started coming out above the tank. I had to drop the tank and this was the remnants of the fuel line and return line:
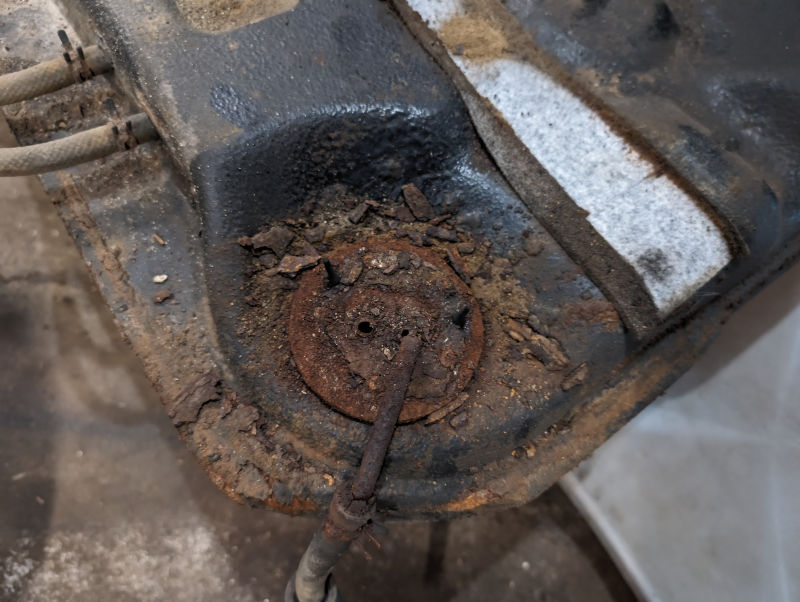
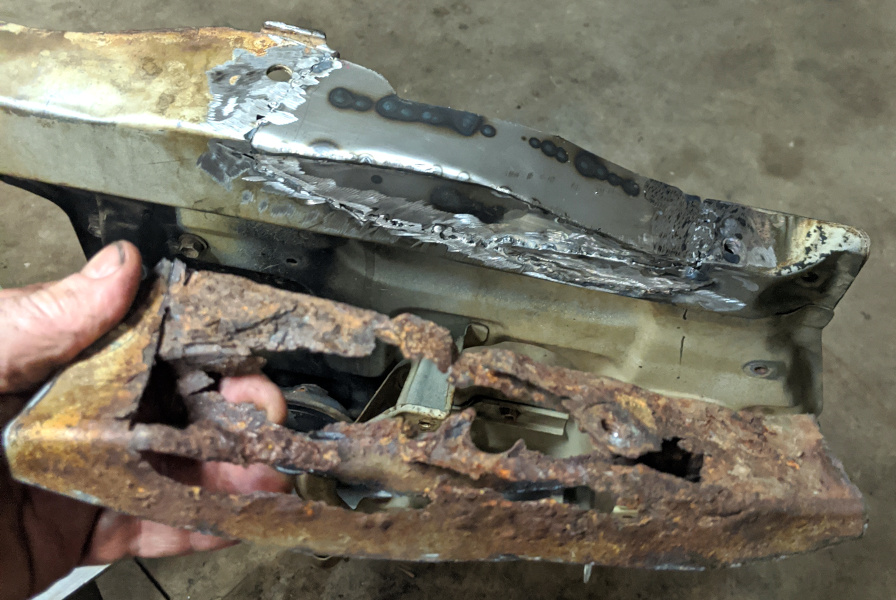
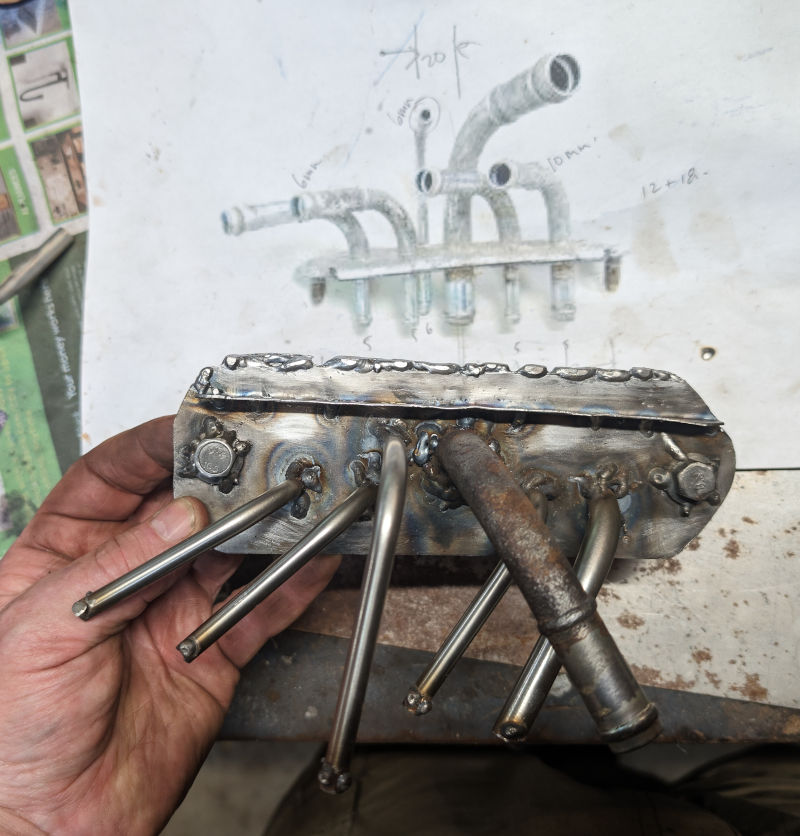
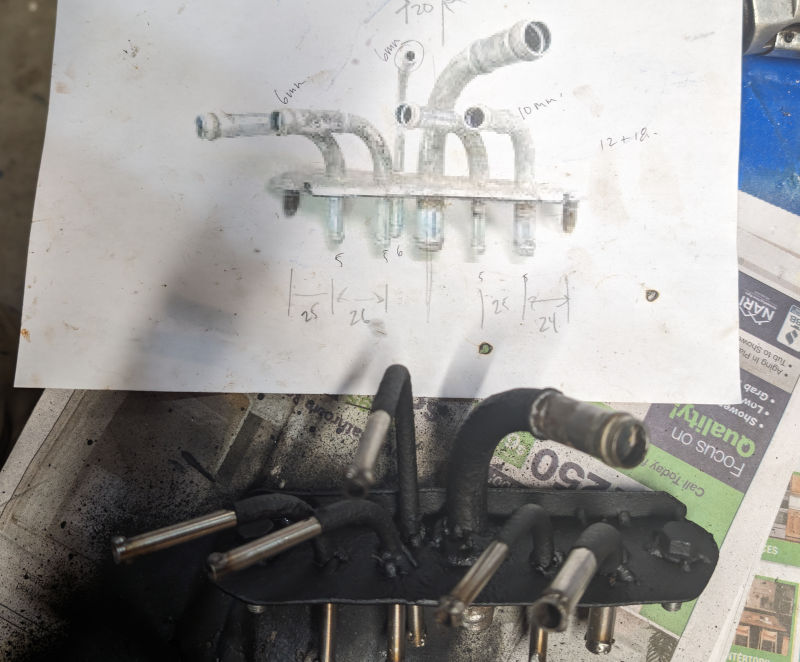
Then I found that the "fuel connector" which is a little custom plate with six steel lines running through (it serves as a firewall between rear fender volume and under-body) was also crumbling and at least one line was leaking. After looking at prices for used, soon to be fully rusted parts, I ended up making a new one, with all new stainless tubes except the filler neck vent tube which was in good shape so I reused. I don't have a steel line beading tool on hand but a few blobs of stainless weld wire work just fine to form a good hose nipple.
I also decided to encapsulate rust, add fiberglass shell, and paint the fuel connector splash shield, which was perilously close to rusting out entirely. Now the rest of the metal can rust away and there's enough fiberglass structure to replace it.
Chapter 7: No drips allowed
[264,850 miles] A new drip showed up, and turned out to be hydraulic fluid from a leaking seal at the input shaft of the power steering box. Rebuild.
Chapter 8: Vibes
[266,260 miles] The driveline started vibrating a bit at highway speed; I found that the forward u-joint on the rear driveshaft was failing, so that got replaced. At the same time the rear diff pinion seal was leaking a bit, replaced that too and then decided to pull the diff and make sure all was well there, since the pinion crush sleeve had been over torqued by some previous mechanic and could no longer be removed through the outside pinion bearing race. Due to the over crush, the pinion bearing preload could not be properly set.